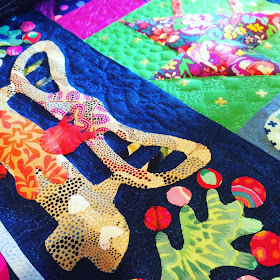
A few people have asked me how I work my applique. I travel with my needlework and thus prefer to use as few pins as possible, especially as I am often at swimming pools or parks with grass lawns.
For this example I am showing a few shots of Pandemonium, designed by Kim McLean.
Her patterns are printed on large sheets of paper. They are somewhat sheer. My first step is I number the creatures, or flower pots, trees, etc as needed. I use a fine-line sharpie to avoid smudging.
I use a piece of freezer paper and trace the shape. I label it with the same number as on the pattern. I then decide what color I want it and label the piece with the color.
I've traced a few shapes here, maybe 10-15. I've found it is good to not repeat the same motions over and over again. Then they are rough cut out with paper scissors and organized into piles by color.
I pull scraps out of my scrap bin and press them flat with an iron. I might starch at this point or use Best Press.
Picking and choosing what bits of the fabric I want showing is my favorite part. I iron the freezer paper patterns onto the fabric and then let cool.
Using fabric scissor or a rotary cutter, I cut out the applique pieces.
Since the original pattern is somewhat sheer, I am able to lay down the background piece, place the applique piece, check with the pattern, and then pin down. I like flower pins because they are long enough that I don't lose them on the ground and they are easy to pull out. They have a fine shank too.
I usually pin several pieces at once.
Next I use a 3 mm stitch on my machine and sew through the drawn lines on the freezer paper. It can take a while. I then remove the freezer paper, and my pieces are now basted onto the fabric with no pins. I use a seam ripper and break about every 10 stitches on a piece and do my needleturn applique. After that it is just a matter of practice for turning corners, knowing when to clip, etc. I like to repress with an iron and might use Soak's Flatter spray or more starch.
This was before my sewing room remodel. I didn't have a good spot to lay out blocks so I would pin them to the walls so I could make sure I was being consistent in my color use from block to block.
My old Brother sewing machine was a great one.
I actually made the back of the quilt before I started on the front. Here is Clark demonstrating his love of quilts.
Many of the blocks were both pieced and appliqued. A lot of fun! I like Karen Kay Buckley's Perfect Ovals and Perfect Circles tools.
Choosing fabric was a lot of fun - I used Aboriginal Prints, Kaffe Fassett and Philip Jacobs fabrics, batiks, Liberty, Cotton & Steel, Tula Pink and many more. I did have a lot of stash but I kept buying more.
Thanks for reading!


No comments:
Post a Comment