Yes, I am nuts. I had a *brilliant* idea that a super-great way for me to use up all my tiny Kaffe scraps would be to make a Cathedral Windows quilt! Ok, let's back up.
I made my super-beautiful Lollypop Trees quilt, and I totally love it. I ended the project with a drawer full of holey-fabric and loads of scraps. I'm not really a stash-keeper girl so I knew my next project would use the same fabrics. So I made the backing. Still lots of scraps. My plan then was to make the Lilly Pilly Tree quilt, and I still plan on doing that, but it uses mainly pinks. So then I made the Sweet Quilt to use up more scraps, which my friends dubbed the "Twister for Kitties" quilt (not Kitty Twister, because that could become obscene). The Sweet Quilt is going to be the backing for the Lilly Pilly quilt.. well, I needed to buy some more white fabric as the backing for the Lilly Pilly Tree appliques.
Clarke on the quilt, Lois on the edge - 6 months old
So at this point, I have an almost completed backing, a not started front, and still loads of multi-colored Kaffe Scraps that are getting progressively smaller and smaller. I'm not used to applique! In all my previous quilts there was lots of big pieces and no such thing as fussy cutting because let's not waste fabric! Then I was flipping through a Japanese Quilting magazine (where I totally couldn't read any text) and I saw a picture of a purse made with Cathedral Windows. Yes, I remembered those... and wouldn't it be a *brilliant* way to use up all my little 2" or bigger scraps? Indeed.
So, new quilt. It is not going fast. Yet it is easy, and fun, and I love the colors. Also completely hand sewn so perfect for poolside and horse-arena-side and soccer-side and walking-around-museum-side and you get it. Not as cool to show as Lollypop Trees because they just look like little squares. *but I know how awesome it is going to be.*
Want to make some with me? Poor instructions follow. After all, I was working off of grainy pictures so you should too.
I am using lots of random black fabrics for my backing. I didn't want to buy lots of yardage from the get-go, so I am buying black fabric from Pacific Fabrics here in Washington. It's all from the same company (Michael something-or-other) so I figure the colors will match even if all the prints are a tiny bit different. I like the variation.
Cut a 6.5" square. It really does need to be square. I know, what a pain.
Using a super-hot iron, finger press down the top edge 1/4 inch. You'll get really good at this. Press with your super-hot iron. Don't swish the iron back and forth as that stretches out your fabric. Press down. Turn your block 90 degrees and repeat. Repeat for all four sides.
Fold your square into a rectangle, finger crease, unfold, refold the other way, finger crease, unfold. You just want a light grid in the center so you can sort of see where the points should go. This is black fabric so it's tough. Note the crease marks that are in the picture are from later ironing. I made one and then undid it for pictures.
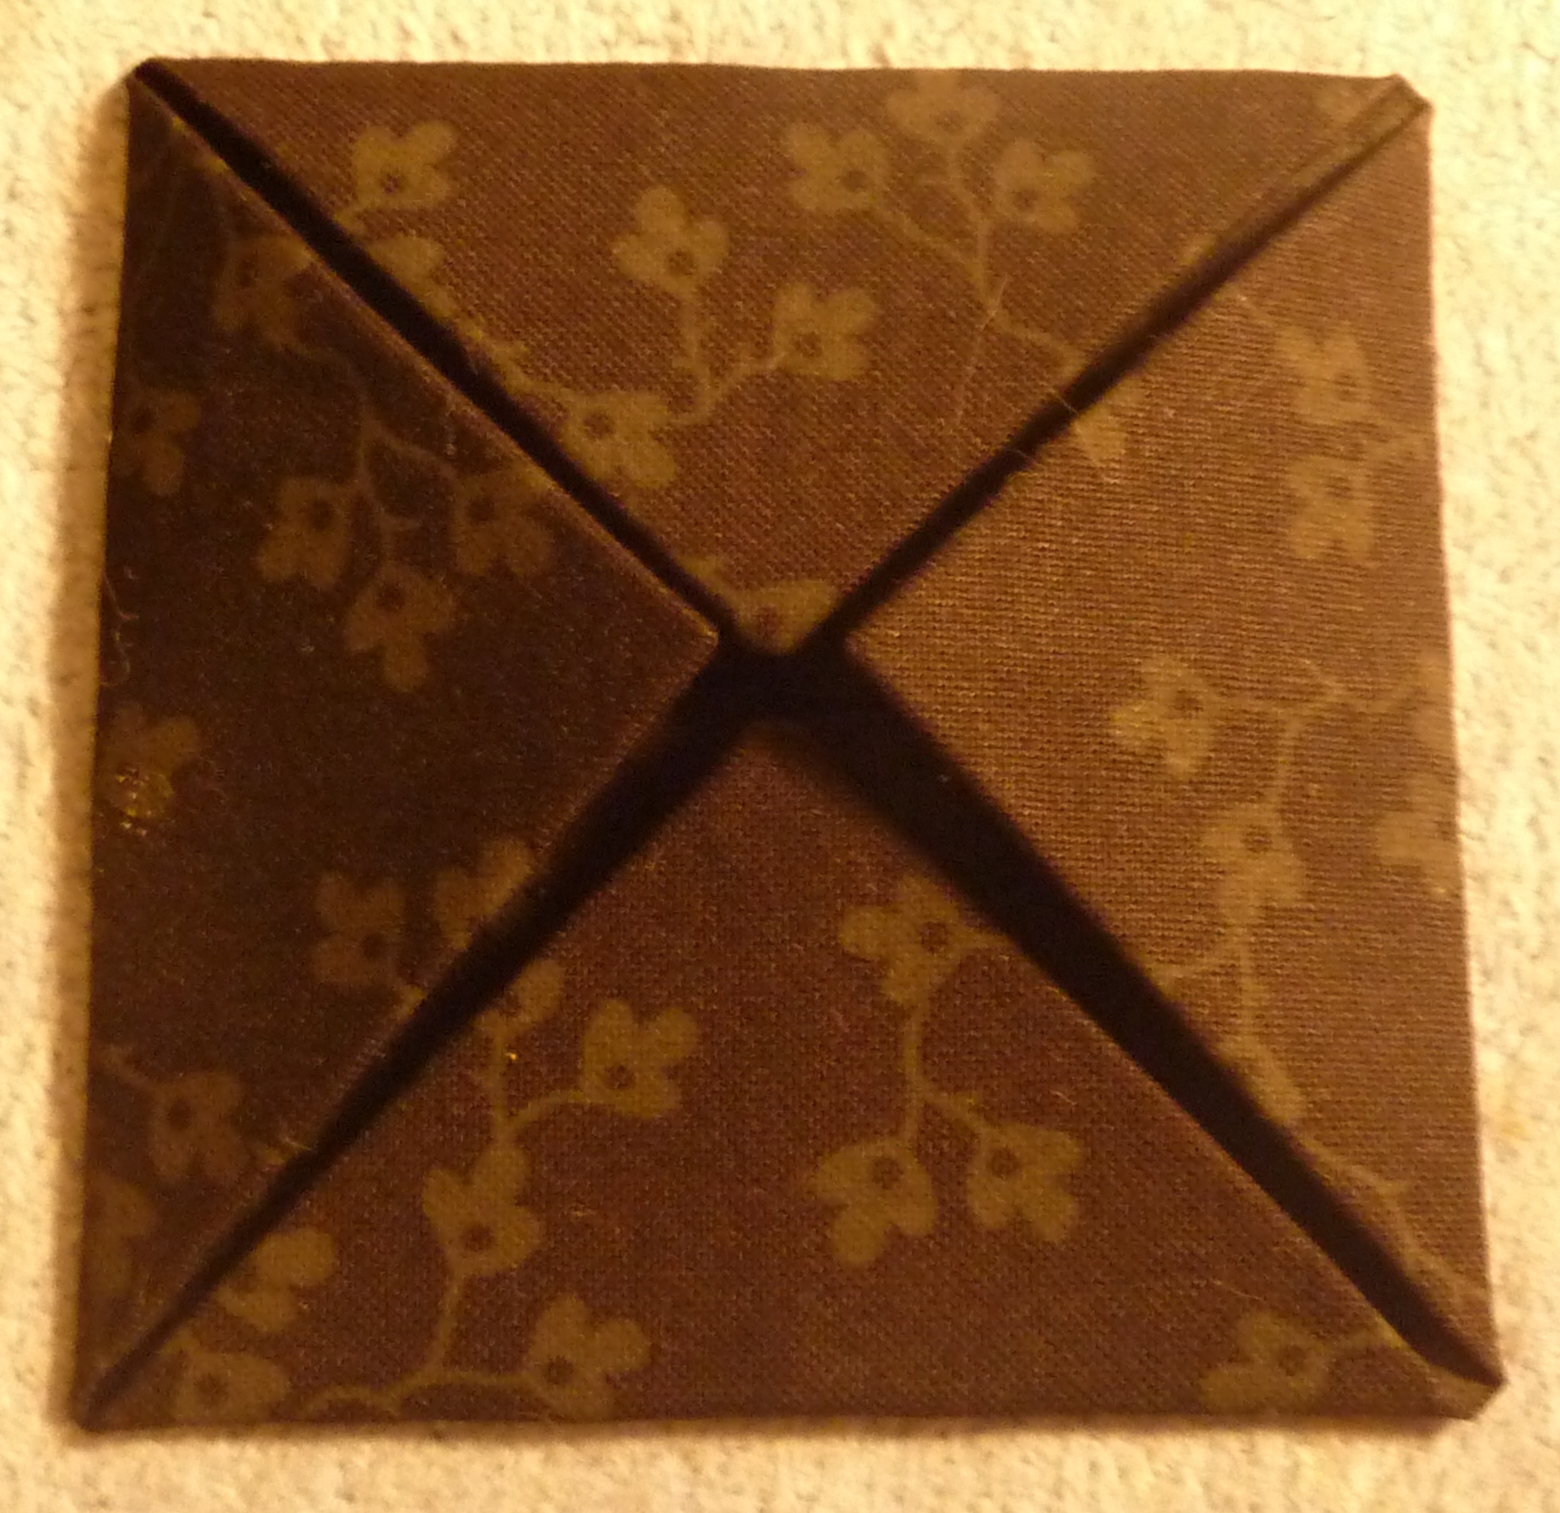
Fold down each corner into the center. Wiggle the fabric as needed to try and get sharp points. Press with the iron.
It should look something like this:
Now fold the corners in again. Try and get really sharp points again.
If your corners aren't perfectly sharp (like the dull ones on the right side) you will have to adjust them when you stitch them together. It's ok, just takes a little longer.
Now make like a gazillion of these squares. Or 12, which is how many I make for each panel.
Take a piece of black thread (needs to be black, I ran out at the beginning and used navy and it was a waste of fabric) and open up the square a bit. Use longer straight stitches to stitch the center bits together. Then use stitches that go through the points of the fold and stitch the center part together. You shouldn't have any thread on the back side of the square.
Take two of the squares and put them right sides together (with all the folds facing). Now stitch along the edge. Unfold and press out. Now take two sets of two and sew those together for a grouping of four.
Now the fun part - take a colored fabric and cut it to be 2" square. Fold it like a cheap paper napkin and trim off the edges so that the edges dip in to the center. This helps it look smooth.
Pin the square over the stitched seams of the grouping. Anchor your thread on the seam and working from the center of the side, roll over the edge of the black fabric onto the colored square and stitch it in place. When you get to the corner, you may need to fold under some of the colored fabric.
So, when I started I knew I wanted to go from light to dark, like I did with my backing of the Lollypop Trees. I was just randomly grabbing light colors out of the bag. Then I realized I needed to start planning colors. I laid out all the fabrics and grouped them by color, then put them in bags labeled A1, A2, A3, B1, B2, etc. I am going to have three rows by three columns with hopefully good blending between the panels.
When I get towards the edge of a panel or need to sew a panel to the previous one, I lay out a few squares, then I pin them in order from bottom to top with a sticky note labeled "seam", "middle", "left", or "right". That way I don't have to keep repinning and unpinning them and can just pull off one at a time and work from bottom to top.
So yes, I'm probably a little nuts about this. I do think it will be great when finished. It's about the journey!